How to Make Kefir | Tips and Tricks for the Best Kefir at Home
Posted by Steve Shapson on 8th Apr 2016

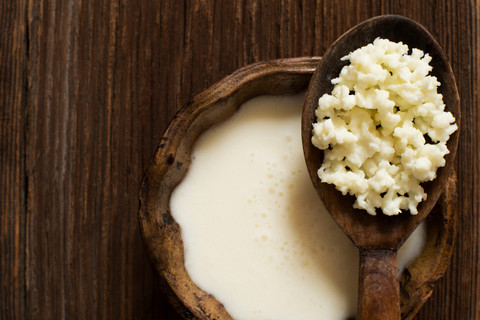
Similar to yogurt, Kefir is known for its refreshingly tart flavor and health benefits thanks to one staple ingredient—Yeast. The consistency is thought of as a drink and contains probiotic bacteria that can also be found in yogurt. The combination of natural bacteria and yeast found in Kefir leave you with a healthy snack that’s high in vitamins and minerals as well as other health benefits. Whether you’re a seasoned Kefir maker or you’re looking to try something new, follow these tips and tricks that will result in the best Kefir for your home.
Revitalizing Kefir Grains
When it comes to making large batches of Kefir, which is the preferred method, your Kefir Grains will need to be revitalized. To do this, you will want to start with a small amount of milk and gradually increase how much milk you add to reach the amount of Kefir you want to make.
Preparing for Time Sensitivity
Different from the cheese making process, Kefir is ready within 24 hours. This prevents you from having to store mass amounts of Kefir for the sake of saving time on the production process. While the minimal make time is convenient, it also prompts you to make only the amount you’re planning to drink at one time so your Kefir doesn’t over-ripen to avoid a sour taste.
Making Kefir to Taste
If you’re just beginning your home trial of making Kefir, don’t be discouraged if your first batch turns out slightly sour. This simply means the fermentation process was carried on a little too long. Use this knowledge when creating the next batch to assure that you’re checking on your Kefir at regular intervals. The purpose of the first batch is merely to adjust the grains. The following batch will be your actual drink that you can adjust to taste by adding more milk, removing some of the grains, or altering your fermenting time.
Growing Grains Faster
As mentioned above, the first batch is made to adjust the grains to your taste. In an effort to grow your grains quicker, do not pour out the milk from the first batch. Instead, you will want to pour more milk into the already fermented jar of Kefir as this will speed the process.
Making Kefir as a Drink
While Kefir is similar to yogurt, the texture and consistency of the healthy snack can be easily manipulated. If you’re looking for a primarily liquid Kefir, you’ll simply strain the grains out of your jar through a stainless steel strain, leaving the liquid Kefir behind in a bowl. The grains that you’ve then removed can be placed in a fresh batch of milk to repeat the process.
Taking a Break from Kefir Making
If you end up with too many grains from the Kefir making process, storing grains for future use is simple! You’ll want to strain the grains, using fresh water to rinse off any white milky parts from your existing batches and freeze them in a sealed container or Zip Log bag. If you’re going a short amount of time without making Kefir, the process is even easier. In this case, you’ll strain the grains from your batch and store them in fresh milk in your refrigerator. This is done to slow the fermentation process by mixing your milk and grains with a cold temperature. If you notice your grains aren’t looking right, simply add milk every now and then to assure that they are fed.
Spoiled Grains
If you’ve taken time away from the Kefir you’ve made and begin to notice a taste that’s more sour than usual or start to see mold, do not re use your existing grains. In this case, you will want to rid yourself of the grains in that batch and begin the fermentation process fresh with new grains.

